Project VersionsSearchTable Of ContentsPrevious topicNext topicThis Page |
教程 2: 解读分析 INVO 项目¶在第二个教程中,我们将解读分析一个更完整的应用程序,以强化你对Phalcon的理解,INVO是我们已经创建了的作为示例程序的应用程序之一。你可以从 Github 获得INVO的全部代码。 此外还需要说明的是,INVO的html实现是使用 Twitter Bootstrap CSS framework来完成的,在这个示例项目中,并不真正的生成发票(这是一个类似于进销存的相关的应用),但它作为一个例子还是可以告诉你整个框架是如何工作的。 项目目录结构¶从Github上克隆了源代码后,你可以发现目录结构是这样的: invo/
app/
app/config/
app/controllers/
app/library/
app/models/
app/plugins/
app/views/
public/
public/bootstrap/
public/css/
public/js/
schemas/
在前面的章节已经讲过,Phalcon并没有固定的目录结构,该项目提供了一个简单的MVC目录结构。 通过浏览器打开应用程序 http://localhost/invo 显示效果如下: 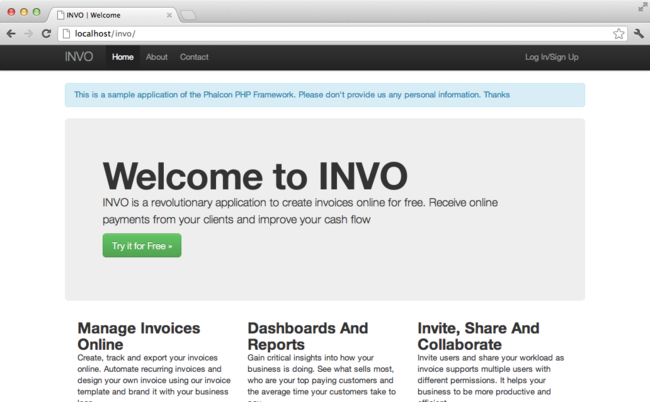
INVO应用程序分为两部分,即通常我们说的前台后台。前台部分,用户可以通过INVO查看一些信息,同时可以提交联系方式。后台部分,相当于管理区域,在这里面注册用户可以管理自己的产品和客户。 标准路由器¶INVO使用标准的内奸路由器组件,此路由的匹配模式如下 /:controller/:action/:params ,这意味着,URL中的第一部分是控制器,第二个是action方法。 路由 /session/register 将要执行SessionController中的RegisterAction方法 Configuration¶INVO有一个配置文件,用于设置一些常用的数据,比如数据库连接参数,目录结构等。在引导文件 (public/index.php) 的第一部分,可以这样读取配置文件 <?php
//Read the configuration
$config = new Phalcon\Config\Adapter\Ini(__DIR__.'/../app/config/config.ini');
Phalcon\Config 使得读取配置内容是面像对象的,配置文件的定义如下: [database]
host = localhost
username = root
password = secret
name = invo
[application]
controllersDir = /../app/controllers/
modelsDir = /../app/models/
viewsDir = /../app/views/
pluginsDir = /../app/plugins/
libraryDir = /../app/library/
baseUri = /invo/
;[metadata]
;adapter = "Apc"
;suffix = my-suffix
;lifetime = 3600
Phalcon的配置文件可以分类进行定义,在这个文件中,共定义了三个部分 database,application,metadata Autoloaders¶在引导文件 (public/index.php) 的第二部分是autoloader,autoloader注册了一些目录,在这些目录中放置的是我们应用程序需要用到的类文件 <?php
$loader = new \Phalcon\Loader();
$loader->registerDirs(
array(
__DIR__.$config->application->controllersDir,
__DIR__.$config->application->pluginsDir,
__DIR__.$config->application->libraryDir,
__DIR__.$config->application->modelsDir,
)
)->register();
需要注意的是,注册的这些目录并不包括 viewsDir,因为viewsDir中并不包含classes文件,而是html+php文件 处理请求¶在引导文件的最后部分,我们使用 Phalcon\Mvc\Application ,这个类初始化并执行用户的请求 <?php
$application = new \Phalcon\Mvc\Application();
$application->setDI($di);
echo $application->handle()->getContent();
依赖注入¶看上面代码中的第二段,变量$application通过setDI()方法接收了变量$di,该变量的目的是什么呢? Phalcon是一个松耦合的框架,所以我们需要一个组件,把它们整合到一起,让它们一起工作,该组件便是 Phalcon\DI 注册到容器的方法有很多,在INVO中,大都采用匿名函数的方式进行注册,因为此种方式是lazy load的加载方式,减少了应用程序请求资源控制。 例如,在下面的代码片断中的session会话服务,采用的是匿名函数的方式进行注册的,因此当使用session的时候,才会被加载。 <?php
//Start the session the first time when some component request the session service
$di->set('session', function(){
$session = new Phalcon\Session\Adapter\Files();
$session->start();
return $session;
});
在这里,我们可以自由的更改适配器,以使它执行更多的初始化任务,请注意,服务注册的”session”请不要随意修改,这是一个命名约定。 译者注:更多的服务组件命名约定可见 dependency injection container 一个请求可能使用多个服务组件,一个一个的注册这些组件是一项繁重的任务,出于这个原因,该框架提供了 Phalcon\DI 的一个实现,就是 Phalcon\DI\FactoryDefault 译者注:其实 Phalcon\DI\FactoryDefault 就是 Phalcon\DI 的一个子类 <?php
// The FactoryDefault Dependency Injector automatically registers the
// right services providing a full stack framework
$di = new \Phalcon\DI\FactoryDefault();
It registers the majority of services with components provided by the framework as standard. If we need to override the definition of some it could be done as above with “session”. Now we know the origin of the variable $di. 大多数的服务组件都由框架本身提供,如果我们需要覆盖一些定义的话,比如”session”.(翻译的可能不对,英文部分就不去掉了) Log into the Application¶登录将使用后端控制器,控制器前后端分离是合乎逻辑的,所有的控制器被放置到相同的目录中。要登录系统,我们必须有一个有效的用户名和密码,用户信息被存储在数据库”invo”的”users”数据表中。 在我们登录系统之前,我们需要在应用程序中配置数据库连接。一个命名为”db”的服务组件被注册,与autoloader相同,我们也从配置文件中读取相关配置连接参数 <?php
// Database connection is created based in the parameters defined in the configuration file
$di->set('db', function() use ($config) {
return new \Phalcon\Db\Adapter\Pdo\Mysql(array(
"host" => $config->database->host,
"username" => $config->database->username,
"password" => $config->database->password,
"dbname" => $config->database->name
));
});
这时,会返回一个MySQL的连接适配器的实例,如果需要的话,你可以做一些其他额外的操作,例如,你还可以定义一个记录器,分析器或更改为其他适配器。或者设置你想要的其他东西 那么,下面的这个表单示例 (app/views/session/index.phtml) 是一个登录入口,已经删除了一些HTML代码,使这个例子更简洁: <?php echo Tag::form('session/start') ?>
<label for="email">Username/Email</label>
<?php echo Tag::textField(array("email", "size" => "30")) ?>
<label for="password">Password</label>
<?php echo Tag::passwordField(array("password", "size" => "30")) ?>
<?php echo Tag::submitButton(array('Login')) ?>
</form>
SessionController::startAction (app/controllers/SessionController.phtml) 验证用户登录,通过查询数据库的用户的登录名称和密码是否正确 <?php
class SessionController extends ControllerBase
{
// ...
private function _registerSession($user)
{
$this->session->set('auth', array(
'id' => $user->id,
'name' => $user->name
));
}
public function startAction()
{
if ($this->request->isPost()) {
//Taking the variables sent by POST
$email = $this->request->getPost('email', 'email');
$password = $this->request->getPost('password');
$password = sha1($password);
//Find for the user in the database
$user = Users::findFirst("email='$email' AND password='$password' AND active='Y'");
if ($user != false) {
$this->_registerSession($user);
$this->flash->success('Welcome '.$user->name);
//Forward to the invoices controller if the user is valid
return $this->dispatcher->forward(array(
'controller' => 'invoices',
'action' => 'index'
));
}
$this->flash->error('Wrong email/password');
}
//Forward to the login form again
return $this->dispatcher->forward(array(
'controller' => 'session',
'action' => 'index'
));
}
}
需要注意的是控制器中有多个公共属性,如$this->flash,$this->request,$this->session。这些属性在引导文件中使用 Phalcon\DI 注册的,如果你仔细看过前面的章节,应该能想到。因此可以在控制器中直接使用他们 这些服务是共享的,这意味着我们访问的是相同的实例,无论我们在任何地方调用它们。 举个例子,在这里我们可以直接调用 “session”, 同时把用户的信息存储到变量auth中 <?php
$this->session->set('auth', array(
'id' => $user->id,
'name' => $user->name
));
Securing the Backend¶后端是一个私有区域,只有注册的用户才可以访问。因此,它必须进行检查验证,只有注册用户才可以访问这些控制器。如果你没有登录应用程序,你尝试访问的时候,你会看到这样的界面: 
每当有人试图访问任何控制器和动作,应用程序就会验证当前用户的角色是否能够访问,否则会显示一个信息,同时跳转到首页面。 现在,我们来看看应用程序如何实现这一点。首先要知道的是,有一个组件叫分发器(Dispatcher),你还需要了解一个路由。在此基础上,负载加载相应的控制器和执行相应的动作。 通常情况下,框架会自动创建分发器,在这个例子中,我们要专门创建一个动作,显示出用户成功访问和不成功访问的情况。为了实现这一目标,我们更在引导文件(bootstrap)中创建一个函数: <?php
$di->set('dispatcher', function() use ($di) {
$dispatcher = new Phalcon\Mvc\Dispatcher();
return $dispatcher;
});
现在,我们的应用程序中就有了控制分发器,现实中,我们需要修改框架中有许多组件的内部流程,这时一个新的组件EventsManager出来了,它可以提供在组件中加入一些其他对像。 译者注:如在分发器中加入验证,在数据库连接中加入记录器等 事件管理¶一个事件管理器,可以让我们针听一个特定类型的事件,下面看一下在分发器中加入安全验证的例子: <?php
$di->set('dispatcher', function() use ($di) {
//Obtain the standard eventsManager from the DI
$eventsManager = $di->getShared('eventsManager');
//Instantiate the Security plugin
$security = new Security($di);
//Listen for events produced in the dispatcher using the Security plugin
$eventsManager->attach('dispatch', $security);
$dispatcher = new Phalcon\Mvc\Dispatcher();
//Bind the EventsManager to the Dispatcher
$dispatcher->setEventsManager($eventsManager);
return $dispatcher;
});
安全插件是一个类文件(app/plugins/Security.php),这个类实现了”beforeExecuteRoute”方法. 译者注:都可以实现哪些方法,可以查看 分发器 Dispatch Loop Events 部分 <?php
use \Phalcon\Events\Event;
use \Phalcon\Mvc\Dispatcher;
class Security extends Phalcon\Mvc\User\Plugin
{
// ...
public function beforeExecuteRoute(Event $event, Dispatcher $dispatcher)
{
// ...
}
}
插件程序接收两个参数,第一个参数是event上下文信息,第二个是事件管理器要管理的对象,插件程序并不一定非得继承自 Phalcon\Mvc\User\Plugin ,但如果这样继承了,他们更容易的访问应用程序的其他服务组件。 译者注:目前的 Phalcon\Mvc\User\Plugin 以及 Phalcon\Mvc\User\Component 是一样的,其实两者的侧重点应该是不同的,只是作者还未完善而已。具体请看stackoverflow的贴子 现在,我们验证登录用户的权限,看他的权限是否在ACL列表中,如果没有(也就是说没有权限的话),分发器将使流程跳转到主页: <?php
use \Phalcon\Events\Event;
use \Phalcon\Mvc\Dispatcher;
class Security extends Phalcon\Mvc\User\Plugin
{
// ...
public function beforeExecuteRoute(Event $event, Dispatcher $dispatcher)
{
//Check whether the "auth" variable exists in session to define the active role
$auth = $this->session->get('auth');
if (!$auth) {
$role = 'Guests';
} else {
$role = 'Users';
}
//Take the active controller/action from the dispatcher
$controller = $dispatcher->getControllerName();
$action = $dispatcher->getActionName();
//Obtain the ACL list
$acl = $this->_getAcl();
//Check if the Role have access to the controller (resource)
$allowed = $acl->isAllowed($role, $controller, $action);
if ($allowed != Phalcon\Acl::ALLOW) {
//If he doesn't have access forward him to the index controller
$this->flash->error("You don't have access to this module");
$dispatcher->forward(
array(
'controller' => 'index',
'action' => 'index'
)
);
//Returning "false" we tell to the dispatcher to stop the current operation
return false;
}
}
}
Providing an ACL list¶权限管理部分,我一般不太喜欢使用这种方式的权限验证,不过大多数框架都提供了这种验证,包括ZF。 In the previous example we obtain the ACL using the method $this->_getAcl(). This method is also implemented in the Plugin. Now explain step by step how we built the access control list: <?php
//Create the ACL
$acl = new Phalcon\Acl\Adapter\Memory();
//The default action is DENY access
$acl->setDefaultAction(Phalcon\Acl::DENY);
//Register two roles, Users is registered users
//and guests are users without a defined identity
$roles = array(
'users' => new Phalcon\Acl\Role('Users'),
'guests' => new Phalcon\Acl\Role('Guests')
);
foreach($roles as $role){
$acl->addRole($role);
}
Now we define the respective resources of each area. Controller names are resources and their actions are the accesses in the resources: <?php
//Private area resources (backend)
$privateResources = array(
'companies' => array('index', 'search', 'new', 'edit', 'save', 'create', 'delete'),
'products' => array('index', 'search', 'new', 'edit', 'save', 'create', 'delete'),
'producttypes' => array('index', 'search', 'new', 'edit', 'save', 'create', 'delete'),
'invoices' => array('index', 'profile')
);
foreach($privateResources as $resource => $actions){
$acl->addResource(new Phalcon\Acl\Resource($resource), $actions);
}
//Public area resources (frontend)
$publicResources = array(
'index' => array('index'),
'about' => array('index'),
'session' => array('index', 'register', 'start', 'end'),
'contact' => array('index', 'send')
);
foreach($publicResources as $resource => $actions){
$acl->addResource(new Phalcon\Acl\Resource($resource), $actions);
}
The ACL now have knowledge of the existing controllers and their related actions. The role “Users” has access to all the resources of both the frontend and the backend. The role “Guests” only have access to the public area: <?php
//Grant access to public areas to both users and guests
foreach ($roles as $role) {
foreach ($publicResources as $resource => $actions) {
$acl->allow($role->getName(), $resource, '*');
}
}
//Grant access to private area only to role Users
foreach ($privateResources as $resource => $actions) {
foreach ($actions as $action) {
$acl->allow('Users', $resource, $action);
}
}
Hooray!, the ACL is now complete. 用户自定义组件¶本应用所有的UI组件和显示风格都是使用的Twitter的CSS Framework。 这部分被实现使用成Component (api/library/Elements.php)。 译者注:在上面讲Plugins的时候,专门介绍了Component,没注意的可以往上看一下。 <?php
class Elements extends Phalcon\Mvc\User\Component
{
public function getMenu()
{
//...
}
public function getTabs()
{
//...
}
}
这个类继承自 Phalcon\Mvc\User\Component,虽然框架本身不强制要求继承,但如果你继承了它,将更方便的访问应用程序中的其他组件。现在,我们把它注入到容器中: <?php
//Register an user component
$di->set('elements', function(){
return new Elements();
});
在控制器中以及视图中,插件以及组件可以通过注册的名称很方便的被调用 <div class="navbar navbar-fixed-top">
<div class="navbar-inner">
<div class="container">
<a class="btn btn-navbar" data-toggle="collapse" data-target=".nav-collapse">
<span class="icon-bar"></span>
<span class="icon-bar"></span>
<span class="icon-bar"></span>
</a>
<a class="brand" href="#">INVO</a>
<?php echo $this->elements->getMenu() ?>
</div>
</div>
</div>
<div class="container">
<?php echo $this->getContent() ?>
<hr>
<footer>
<p>© Company 2012</p>
</footer>
</div>
重点看这句: <?php echo $this->elements->getMenu() ?>
增删查改¶大多数菜单选项数据(如公司,产品,产品类型等),我们开发按照普遍的 CRUD (Create, Read, Update and Delete)方式,每个CURD包含以下文件: invo/
app/
app/controllers/
ProductsController.php
app/models/
Products.php
app/views/
products/
edit.phtml
index.phtml
new.phtml
search.phtml
每个控制器包含以下一些动作(控制器类中的方法): 译者注:这些动作名称并不是约定的,可以按你的喜好自由修改,比如searchAction,你可以写成soAction都没问题。但请求的时候就不再请求到products/search了,而是需要请求到products/so <?php
class ProductsController extends ControllerBase
{
/**
* The start action, it shows the "search" view
*/
public function indexAction()
{
//...
}
/**
* Execute the "search" based on the criteria sent from the "index"
* Returning a paginator for the results
*/
public function searchAction()
{
//...
}
/**
* Shows the view to create a "new" product
*/
public function newAction()
{
//...
}
/**
* Shows the view to "edit" an existing product
*/
public function editAction()
{
//...
}
/**
* Creates a product based on the data entered in the "new" action
*/
public function createAction()
{
//...
}
/**
* Updates a product based on the data entered in the "edit" action
*/
public function saveAction()
{
//...
}
/**
* Deletes an existing product
*/
public function deleteAction($id)
{
//...
}
}
检索表单¶检索表单显示了数据表(products)中的所有可查询的字段,允许用户根据自定义检索内容。 数据表”products”,关联了数据表”products_types”,在这种情况下,我们在检索页面这样写: <?php
/**
* The start action, it shows the "search" view
*/
public function indexAction()
{
$this->persistent->searchParams = null;
$this->view->setVar("productTypes", ProductTypes::find());
}
所有”product types”将通过变量”productTypes”显示到视图文件中,视图文件(app/views/index.phtml)的代码如下: <?php
<div>
<label for="product_types_id">Product Type</label>
<?php echo Tag::select(array(
"product_types_id",
$productTypes,
"using" => array("id", "name"),
"useDummy" => true
)) ?>
</div>
变量$productTypes包含的数据通过 Phalcon\Tag::select 填充到视图进行显示。一旦提交检索表单,它会请求到 products/search,并根据用户提交的数据进行数据检索 执行一个检索¶“search”,即products/search 这个动作具有双重行为,当通过POST访问时,它会根据用户提交的数据进行条件检索。但是,当我们通过GET访问时,将显示所有产品的列表。这些都是通过HTTP方法来进行区分的。详情请查看 Request component: <?php
/**
* Execute the "search" based on the criteria sent from the "index"
* Returning a paginator for the results
*/
public function searchAction()
{
if ($this->request->isPost()) {
//create the query conditions
} else {
//paginate using the existing conditions
}
//...
}
使用 Phalcon\Mvc\Model\Criteria ,我们可以很方便的把表单提交的数据(值)和数据类型(属性或字段)绑定到一起 <?php
$query = Criteria::fromInput($this->di, "Products", $_POST);
该方法的绑定过程是这样的,首先验证客户端提交的表单数据是否为空”“(空字符串),如果不是,将绑定到数据字段上。如果提交的表单数据是字符串类型的(CHAR, VARCHAR, TEXT等),将使用 “like ‘%%’”这样的形式来进行检索数据。如果不是或不类似于字符串,它会直接使用操作符”=”进行检索。 此外,如果提交的数据中不包括在数据表字段(也可以说成是model字段)中,这些数据将被忽略。此外,提交的数据会自动使用bound parameter的方式进行绑定。 我们把提交的绑定数据存储到session中,此处使用的是 Session Bag <?php
$this->persistent->searchParams = $query->getParams();
Session Bag是一个特殊的属性,它存在于控制器中。这个属性注入的其实是 Phalcon\Session\Bag 组件。 译者注:经测试,使用 $this->persistent->xxx,只能在同一控制器中的不同Action中进行访问,不能在其他控制器中访问到数据。如果需要在不同的控制器访问到变量xxx的数据,可以使用session 封装绑定好数据后,我们通过这个参数来进行数据检索: <?php
$products = Products::find($parameters);
if (count($products) == 0) {
$this->flash->notice("The search did not found any products");
return $this->forward("products/index");
}
如果检索不到任何产品,将跳转到 products/index 页面。否则,读取检索到的数据,进行分页显示: <?php
$paginator = new Phalcon\Paginator\Adapter\Model(array(
"data" => $products, //Data to paginate
"limit" => 5, //Rows per page
"page" => $numberPage //Active page
));
//Get active page in the paginator
$page = $paginator->getPaginate();
最后,把分页的数据绑定到视图上。即把变量$page绑定到视图的page上: <?php
$this->view->setVar("page", $page);
在视图文件(app/views/products/search.phtml) 中,我们这样进行数据显示: <?php foreach($page->items as $product){ ?>
<tr>
<td><?= $product->id ?></td>
<td><?= $product->getProductTypes()->name ?></td>
<td><?= $product->name ?></td>
<td><?= $product->price ?></td>
<td><?= $product->active ?></td>
<td><?= Tag::linkTo("products/edit/".$product->id, 'Edit') ?></td>
<td><?= Tag::linkTo("products/delete/".$product->id, 'Delete') ?></td>
</tr>
<?php } ?>
创建以及更新一条数据记录¶现在,让我们来看看如何使用CURD创建和更新一个记录。通过控制器的”new”和”edit”两个Action,我们可以提交数据输入。他们分别能过”create”和”save”两个Action来保存提交的数据。 译者注:说白了就是 newAction就是新建产品页面,点击右上角的Save按钮保存时,会调用createAction。同理.... 在创建的情况下,我们把用户提交的数据和”products”这个产品实例进行绑定。 译者注:即把用户提交的数据通过绑定到model上,以实现保存到数据库的目的。 <?php
/**
* Creates a product based on the data entered in the "new" action
*/
public function createAction()
{
$products = new Products();
$products->id = $request->getPost("id", "int");
$products->product_types_id = $request->getPost("product_types_id", "int");
$products->name = $request->getPost("name", "striptags");
$products->price = $request->getPost("price", "double");
$products->active = $request->getPost("active");
//...
}
提交的数据被过滤,然后再赋值到对象的属性,保存时,我们就可以知道用户提交的数据有没有符合业务规则。同时,可以在 Products Model中实现验证。 <?php
/**
* Creates a product based on the data entered in the "new" action
*/
public function createAction()
{
//...
if (!$products->save()) {
//The store failed, the following messages were produced
foreach ($products->getMessages() as $message) {
$this->flash->error((string) $message);
}
return $this->forward("products/new");
} else {
$this->flash->success("Product was created successfully");
return $this->forward("products/index");
}
}
现在来说产品编辑部分,首先得保证数据库中有可编辑的数据: <?php
/**
* Shows the view to "edit" an existing product
*/
public function editAction($id)
{
//...
$product = Products::findFirst("id = '$id'");
Tag::displayTo("id", $product->id);
Tag::displayTo("product_types_id", $product->product_types_id);
Tag::displayTo("name", $product->name);
Tag::displayTo("price", $product->price);
Tag::displayTo("active", $product->active);
}
通过 displayTo helper设置从数据库中取得的数据到页面,然后用户可以更改这些数据,然后再通过saveAction保存到数据库。 <?php
/**
* Updates a product based on the data entered in the "edit" action
*/
public function saveAction()
{
//...
//Find the product to update
$id = $request->getPost("id", "int");
$products = Products::findFirst("id='$id'");
if ($products == false) {
$this->flash->error("products does not exist ".$id);
return $this->forward("products/index");
}
//... assign the values to the object and store it
}
动态更改标题¶当你浏览不同的控制器及动作时,网页标题会不同,如果更改标题呢,可以在每个控制器进行初始化: <?php
class ProductsController extends ControllerBase
{
public function initialize()
{
//Set the document title
Tag::setTitle('Manage your product types');
parent::initialize();
}
//...
}
注意,上面的方法中调用了 parent::initialize() ,你可以在 parent::initialize() 方法中加入更多的内容到标题: <?php
class ControllerBase extends Phalcon\Mvc\Controller
{
protected function initialize()
{
//Prepend the application name to the title
Phalcon\Tag::prependTitle('INVO | ');
}
//...
}
最后,我们在视图文件 (app/views/index.phtml) 中这样获得标题: <?php use Phalcon\Tag as Tag ?>
<!DOCTYPE html>
<html>
<head>
<?php echo Tag::getTitle() ?>
</head>
<!-- ... -->
</html>
结束语¶本教程从各个方面讲解了如何使用Phalcon来创建一个应用程序,希望你也能提供示例程序,同时学习更多的内容。 |